Working with applets in JBuilder
Working with applets can sometimes be pretty frustrating. Especially when we need to make adjustments to our applet and the web browser just doesn't want to show our updated version. However, JBuilder seems to work well in this department. Here are the steps:
1. Load JBuilder
2. Close all projects by clicking File -> Close All
3. Choose your output directory:
Go to the JBuilder menu bar and click Tools -> IDE Options.
Note: JBuilder 2 users should instead choose Tools -> Default Project
Properties.
Look for the option for specifying 'Default Out Path' or 'Output
root directory'.
Click the Browse button next to it to specify the location that you
wish JBuilder to place your
.html and .class files, then click OK.
Repeat this step for the 'Source root directory'. This tells
JBuilder where to save your .java files.
4. From the menu, click on File -> New...
5. Choose 'Applet' and click OK 
6. Enter data in the Project Wizard window:

-
The first line, 'File:' is asking you to specify a project to work with
in JBuilder. This is will be the name of your 'project' that you will
be working with in JBuilder. You can think of a project as being similar
to a folder to hold all of your related files, except that it's not a
folder. You can change the path if you wish. However, this line must end
with a filename ending with the .jpr extension. Choose a one-word, short
filename for your project. It MUST end with .jpr to continue.
Other than that, the filename is relatively unimportant. Filling in the rest of the items is optional. Click Finish to continue.
6. Enter data in the Applet Wizard window:

- ** IMPORTANT:
Make the Package line blank (as in picture above).
For Class, enter the name of your applet class.
Leave everything else unchecked. Click Finish to continue.
JBuilder will now let you work with your project. You should see Project Notes in large, bold letters. This is just an HTML file that can be used to keep track of your 'project'. At this point, however, we're not concerned with any project... let's continue:
7. Edit the applet source code

- Now we must edit our source code for our applet. First, click on the .java file for your applet in the upper left window (as shown above). We can see that JBuilder created an applet for us already. It includes a lot of stuff that we don't need. Go ahead and erase everything in the code so we can start from scratch. Here you can do some cutting and pasting if you need to. Now type in or paste your applet code. Make your code look like what we've been doing in class. (Use only the appropriate methods, etc.)
8. Edit the html file
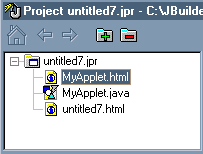
- Now we can work on our web page. Select the .html file as shown above. If the HTML source with all the tags don't show up on the right, you may need to click the 'Source' tab below.

Take out the stuff we don't need from the HTML file. Just leave whatever is needed, as discussed in class.
Remember to properly include the <APPLET> tag wherever we want the applet to be within our web page.
9. Build and Run your applet
- Click Build then Run.
A window should appear showing your applet. If not, then something is wrong. Error in the code? Output path incorrect? Are the .class and .html files in the same directory?
10. Save your source code
- Select your .java file again in the upper left window. Then click File -> Save.
The .java file should be saved in the directory specified in IDE Options (step 3), along with the .html and .class files.
Working in JBuilder, we can test our applet and make any subsequent change easily. We can then Build and Run our applets repeatedly and the updates should show correctly.
When you're satisfied with your applet, you can put it on uhunix via FTP! (You should be able to find your applet files on your computer by looking in the directory specified in Tools -> IDE Options in the Default Out Path directory field.)
Back to main page
June 7, 1999